Our Auckland Drywall Painting service starts with the property and the surfaces involved. For drywall painting, the important considerations include plasterboard joints, patches and first-coat absorption. Understanding the existing material, coating and condition helps define the right preparation before a finish is selected. Tell us about visible wear, previous work and any areas that need particular attention.
A useful proposal should set out the surfaces included, preparation, any agreed repairs, the coating system and access arrangements. Timing also needs to allow for suitable application and drying conditions. Share your address, photographs and preferred timing through the enquiry form, or call to discuss the project. We can then clarify the details that need assessment and the next step for your property.
Plasterboard joints
Why plasterboard seams can still show
Plasterboard is joined and smoothed with compound, and that compound does not behave quite like the paper face beside it. Under paint the difference can appear as a faint ridge or a dull stripe along the joint. It tends to show most when light skims across the wall, which is why it is easy to miss until the room is finished.
Long vertical and horizontal seams. A slight ridge or dip shows in raking light even when it is invisible in flat light.
Screw heads
Each fixing is covered with compound. A small round halo can show if the cover is thin or unsealed.
Internal corners
Where two walls meet, cracking or ridged compound along the angle is a common finishing line.
Old patches
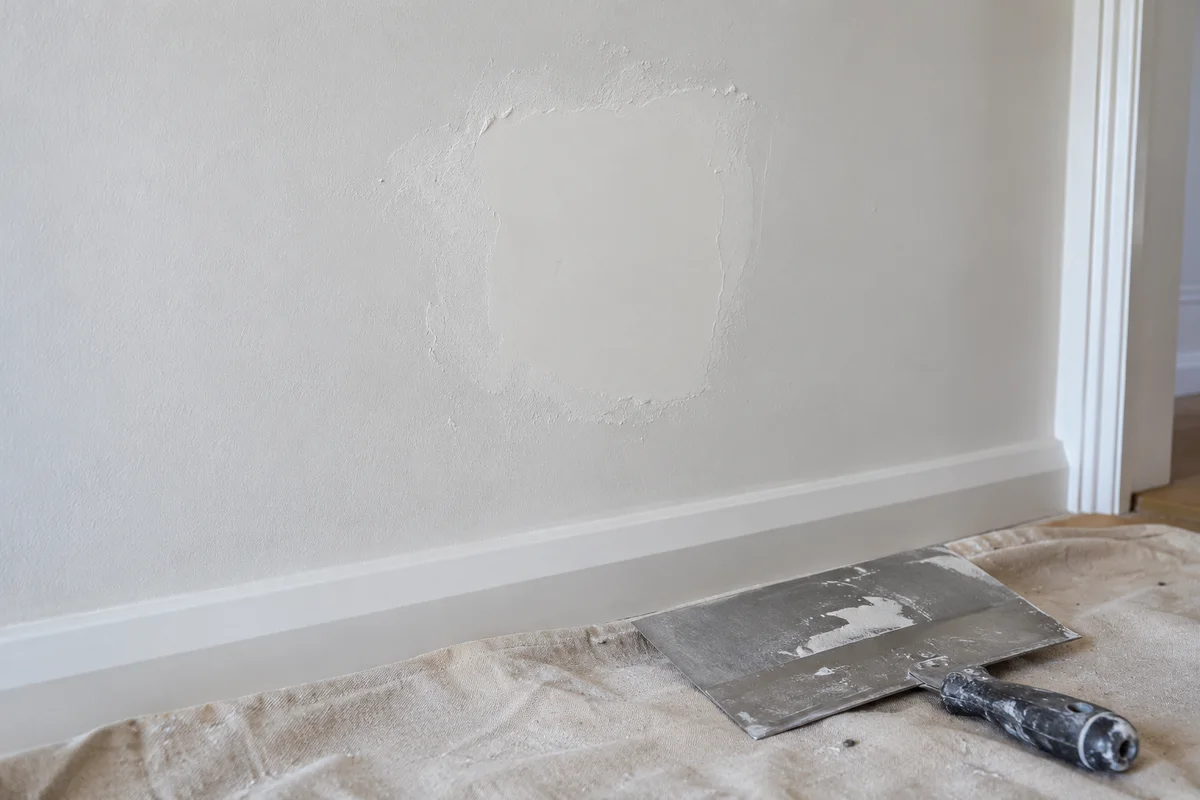
Earlier repairs often differ in texture and absorption from the surrounding wall, and ghost through new paint.
Plasterboard surface
What the paint actually sits on
A plasterboard wall is a paper face with compound over the joints, screws and repairs. Bare paper and compound soak up the first coat at different rates, so patches can look dull or blotchy even when the colour is right. A suitable sealer or primer evens that out before the topcoat.
Paper face
Absorbs moisture from the first coat. Exposed or torn paper needs sealing before paint goes on.
Jointing compound
Sanded smooth over seams and screws. It is more porous than the paper beside it.
Sealer or primer
Evens out absorption so the topcoat dries with a consistent sheen across joints and patches.
Existing paint
Must be clean and sound. Glossy or dirty surfaces need preparing for the new coat to grip.
Light and flaws
Lighting that tells the truth
The same wall can look flawless at noon and uneven at dusk. Check it in the light you actually live with.
Window light raking along a wall shows every ridge
Ordinary room light flattens most flaws
Filler, sealer and paint each leave a layer to inspect
A test patch beside a joint, seen in the room
Wall finishing
Work that shares a wall
A painted wall is the end of a chain of repairs and decisions. These pages cover the steps either side.
The starting surface decides what has to happen before the first coat of colour.
New or freshly repaired board
Bare paper and fresh compound absorb unevenly, so the whole surface should be sealed first.
Seams, screw heads and corners are new and need checking for smoothness.
Dust from sanding must be cleaned off or the sealer will not bond.
Repairs are the likeliest place for the finish to look patchy.
Previously painted wall
The old paint needs a clean, and gloss may need dulling so the new coat grips.
Only the bare or filled spots need sealing, not the full wall.
Strong colour changes may need an extra coat or a tinted undercoat.
Old patches and stains can show through if they are not sealed.
New board needs sealing everywhere. A painted wall needs it only where the surface has been disturbed. Ask which applies to yours.
Preparation standard
From enquiry to agreed preparation standard
Most disagreements over wall finish come from preparation that was assumed rather than written down.
Photograph the walls
Take photos in daylight and with a torch held low against the wall. Mark seams or patches you can already see.
Agree the standard
Ask which flaws are sanded out, which repairs are included and which would need a plasterer instead.
Test sheen and colour
Try a sample on a seam in the room. Check it again after dark.
Put the scope in writing
Record the sealer, the topcoat and how defects found later will be dealt with.
Patch finishing
How a patch stops showing
A repaired spot should end up looking like the wall around it, in texture and in sheen.
Before
Damage cut back to sound board
Loose edges and crumbling board are removed so the repair sits on a firm base. A dent is dealt with differently from a hole.
During
Compound built up and sanded flush
Compound goes on in thin passes and is sanded smooth, extending slightly beyond the damage so the edge disappears into the wall.
After
Sealed so it matches the wall
The patch is sealed before painting. Without that, it can dry as a dull spot even when the colour is identical.
Wall details for a quote
Send photos of your walls
Include the room, whether the board is new or repainted, and any patches, cracks or marks you can see. A photo taken with the light coming from the side is especially useful.